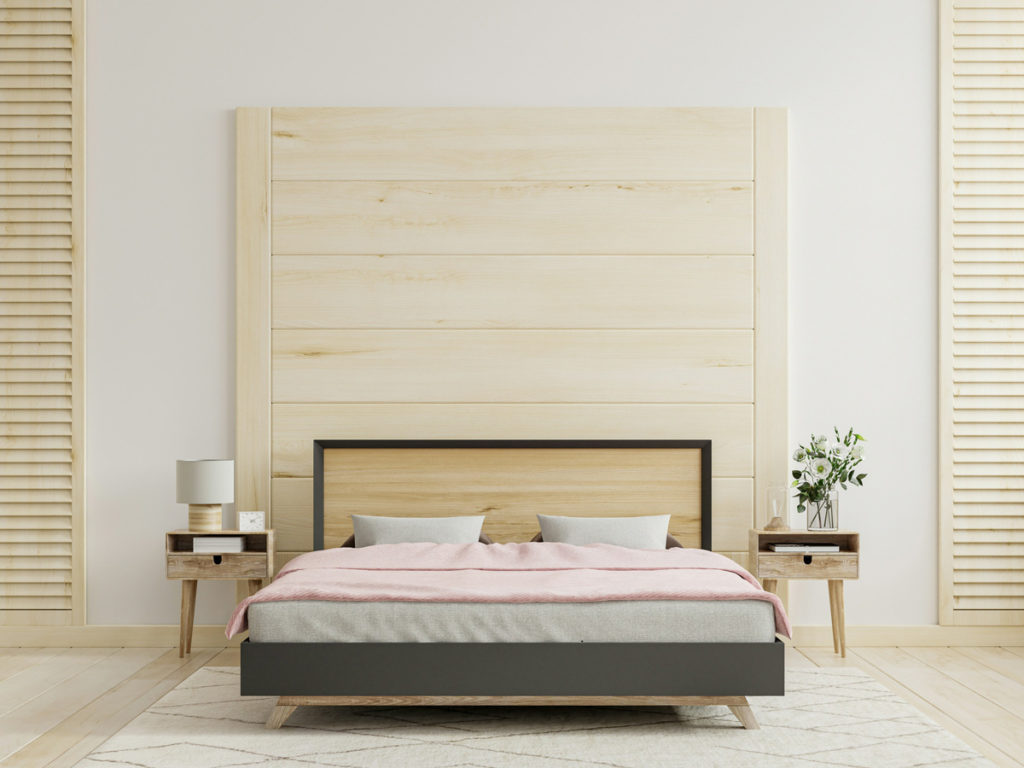
When decorating your bedroom, the bed is often the room’s focal point. The right headboard can transform your bed into a statement piece, making the space more inviting. However, buying a new headboard can be expensive, and sometimes, the style you want may not be readily available. That’s where a faux headboard comes in. By using wall panelling, you can create a stunning and cost-effective headboard that gives your bedroom a fresh, stylish look. Let’s take a deeper look.
Why Choose a Faux Headboard?
Before we dive into the steps, let’s explore why a faux headboard might be the perfect choice for your bedroom:
1. Cost-Effective:
Traditional headboards, especially those made from wood or upholstered in fabric, can be expensive, whilst creating a faux headboard with wall panelling is a budget-friendly alternative.
2. Customisation:
With a faux headboard, you can tailor it to perfectly match your room’s décor.
3. Space-Saving:
A faux headboard doesn’t take up any floor space, making it an excellent option for smaller-sized bedrooms.
4. Easy to Update:
If you ever decide to change your room’s theme or colour scheme, repainting or replacing the panels is much easier than replacing an entire headboard.
Now, let’s get into how you can create your own faux headboard using wall panelling.
Materials You Will Need:
– Wall panelling (MDF panels, shiplap, bead-board, or any other style you prefer)
– Measuring tape
– Level
– Pencil
– Saw (if you need to cut the panels to size)
– Construction adhesive or No Nails
– Finishing nails (optional)
– Paint or stain (if you want to customise the colour)
– Masking tape
– Sandpaper
– Caulk (for filling gaps)
– A damp cloth or sponge (for cleanup)
Step 2: Prepare the Wall and Panels
Before attaching anything to the wall, you will need to prepare both the wall and the panels.
1. Prepare the Wall:
Ensure the wall is clean, dry, and smooth. If there are any holes or imperfections, fill them in with spackle and sand them down until smooth.
2. Prepare the Panels:
If your panels need to be cut to size, use a saw to do so. Sand the edges to ensure they’re smooth. If you plan to paint or stain the panels, now is the time to do it. Apply the paint or stain evenly and allow them to dry completely before proceeding.
Step 3: Mark the Wall
Once your design and measurements are ready, it’s time to mark where the panels will go on the wall.
1. Use your measuring tape and pencil to draw light guidelines where each panel will be placed. Make sure the lines are straight by using a level.
2. If you are creating a pattern with the panels, mark where each piece will go. For example, if you’re using shiplap, mark where the top and bottom edges of each panel will be so you know where to place them.
Step 4: Attach the Panels
Now comes the fun part.
1. Apply a generous amount of construction adhesive or liquid nails to the back of each panel. Be sure to apply it evenly, focusing on the edges and centre of the panel.
2. Carefully press the panel onto the wall, aligning it with the guidelines you drew earlier. Hold the panel in place for a few minutes to ensure the adhesive starts to set.
3. If you’re using heavier panels or want extra security, use finishing nails to hold the panels in place while the adhesive dries. Make sure to drive the nails into the wall studs for the best support.
4. Repeat this process for each panel until your entire faux headboard is in place.
Step 5: Finishing Touches
After the panels are securely attached to the wall, it’s time to add the finishing touches that will make your faux headboard look polished and professional.
1. Caulking:
If there are any gaps between the panels or between the panels and the wall, fill them with caulk. This will create a seamless look. After applying the caulk, use a damp cloth or sponge to smooth it out.
2. Touch-Up Paint:
If you notice any scratches or imperfections, use touch-up paint to cover them.
3. Cleanup:
Clean up any excess adhesive, caulk, or paint using a damp cloth to ensure your headboard looks pristine.
Step 6: Enjoy Your New Faux Headboard!
Once everything is dry and set, step back and admire your work. Your new faux headboard is complete! You’ve created a beautiful, customised focal point for your bedroom that adds both style and personality to the space.
Creating a faux headboard using wall panelling is a simple yet effective way to elevate your bedroom’s décor. Not only is it budget-friendly and customisable, but it’s also a fun DIY project that you can complete in just a few hours. With a little creativity and some basic materials, you can transform your bedroom into a stylish retreat.
P.S. If you want to make life a little easier, check out our Bespoke Headboard kits!